This looks like a five-minute craft. It isn’t. It can be – but only if you set it up properly.
Wire garden labels are deceptively simple: bend wire, shape a name, done. But the real decision happens before you even touch the wire. You’re deciding how much difficulty your child can handle before it stops feeling like play.
Wire pushes back. That’s the whole issue. Paper doesn’t. Dough doesn’t. Wire does.
One child feels that resistance and thinks, “This is cool.” Another feels it and thinks, “I can’t do this.” Same child, different setup, totally different outcome.
Under the surface, this project is asking for:
- two hands doing different jobs at once
- grip strength and control
- patience with small corrections
- spatial awareness (where does the word go, where’s the stem, how much wire is left?)
That’s a lot for a rainy afternoon. Research on children and nature-based activities backs this up – hands-on outdoor projects build both fine motor control and psychological wellbeing (source).
So here’s the anchor point:
You need a visible win within 5 to 8 minutes.
And a finished label within 10 to 15 minutes.
If you hit 15 minutes and nothing is finished, the setup is too hard. Full stop.
Decide the outcome first (this controls everything)
Before tools, before wire – decide what “success” looks like for this session:
- Fast success – one simple readable label (e.g. BASIL)
- Creative play – loops, shapes, decorative tops
- Skill-building – careful letters, repetition, control
- Practical output – multiple labels for real garden use
This decision affects everything: wire type, pacing, how much you step in, how long the session runs. Studies on school garden programmes show that even short hands-on projects measurably improve children’s engagement and practical life skills (source).
And here’s the trap: the object is small, so people assume the project is easy. It’s not.
Small objects require more precision, not less.
Use this as a rough capacity guide:
- Under 7 – 1 label total
- Age 7-9 – 1 to 2 labels
- Age 10+ – 2 to 4 labels (if they like detail)
That keeps you inside a 20 to 40 minute window instead of dragging it out.
What “finished” actually means (don’t move the goalposts mid-way)
A finished label is not perfect. It just needs to work.
- readable from 18 to 24 inches
- letters roughly 1 inch tall (younger kids) or 0.75 to 1 inch (older)
- stem length: 3 inches (small pots), 4 to 5 inches (medium), 6 inches (outdoor use)
- no sharp ends
- child recognizes it as their own work
If it says “MINT” and looks a bit wonky, that’s a win.
One small trick that changes everything
Make one sample before they start.
Not for copying – just so they can hold it, understand it, and skip the confusion phase.
Also time yourself: if it takes you 15 to 20 minutes, simplify. You want a version you can make in under 10 minutes.
Choose the outcome before the supplies. Otherwise you’ll accidentally build a project your child can’t finish.
Choosing the right wire (this is where most people mess up)
This is the decision that makes or breaks the whole experience.
You’re balancing three things:
- bendability
- shape retention
- safety
Soft aluminium craft wire is ideal. Harder wire – like galvanized steel – might look better outdoors, but it fights back. And that “fight” is what kills momentum.
The practical sweet spot
- 2 mm aluminium wire – best for beginners and younger kids
- 12 to 14 gauge aluminium – same range, different labelling
- thinner wire – decoration only
- thicker hard wire – adult use
Why this matters (quick reality check)
Wire has memory. Softer wire stays where you bend it. Harder wire springs back.
That spring-back – sometimes 0.25 to 0.5 inch – is enough to ruin small letters.
You bend it, let go, and it reopens. That’s where frustration starts.
Quick test (do this before you start)
Take a scrap piece and:
- make a sharp bend
- make a loop about 0.75 to 1 inch diameter
If that loop takes more than 10 seconds, or feels like effort, the wire is wrong.
Also test:
- bend a 3 to 4 inch piece with one hand + pliers
- if you need two hands, it’s too stiff
Watch for:
- white stress marks after one bend
- flaking coating
- rough edges
All of those lead to “this is annoying” very quickly.
Wire length (this matters more than people expect)
Pre-cut lengths:
- 12 to 18 inches total range
- 14 inches – short names (PEA, MINT)
- 16 inches – medium words (BASIL, SAGE)
- 16 to 18 inches – decorative designs
Always cut:
- 3 to 4 pieces per child
- plus 2 extra for mistakes
If you want outdoor durability later
Use a hybrid approach:
- soft wire for the name
- stronger wire for the stem
- join with 3 to 5 tight wraps over 0.5 to 1 inch
This keeps it easy to make and strong enough to use.
Tools: what you actually need (and what you don’t)
You don’t need a full setup. You just need tools that don’t slow everything down.
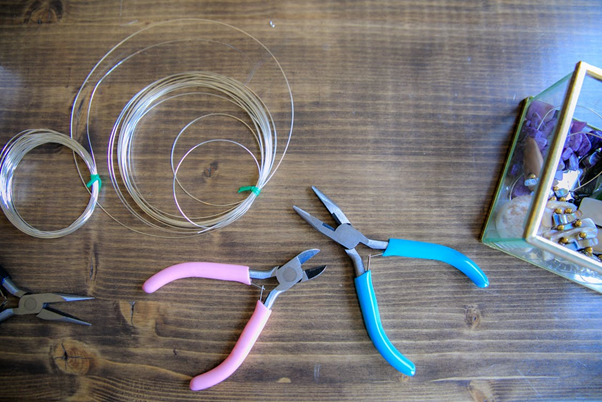
Core tools:
- long nose pliers (primary tool)
- wire cutters (important once wire gets thicker)
- round nose pliers (optional, for loops)
- ruler, marker, tape
If you only buy one thing, long nose pliers.
Tool sizing (don’t skip this)
- ideal: 5 to 6.5 inches long
- under 4.5 inches, too fiddly
- over 7 inches, too bulky
Poor-quality pliers twist wire instead of bending it cleanly. That’s where messy shapes come from.
Table setup (this affects everything)
Keep it simple and consistent:
- tools at the top
- wire on one side
- templates on the other
- scrap bowl
- cloth or mat underneath
Each child needs about 12 x 18 inches of space.
Pre-cut your wire (seriously)
Cut:
- 6 to 10 pieces total
- 3 to 4 per child
- plus 2 extra
Cutting mid-session kills momentum.
How to use the tools properly
- use plier tips for small bends
- deeper grip for stronger bends
- cutters: flat side toward the piece you keep
- hold bends 2 to 3 seconds to reduce spring-back
Some long nose pliers can also cut wire – even harder wires – effectively giving you two tools in one (source)
If needed:
- make the first bend for them (about 45 to 90 degrees, 3 to 5 inches from the end)
Reality check
If a child needs help every 20 to 30 seconds, the setup is too hard.
They should manage 2 to 4 bends independently before needing help.
Template vs freestyle (don’t overthink this – use both)
Freestyle sounds fun, but it often leads to:
- running out of wire
- tiny letters halfway through
- no stem left
Templates quietly fix all of that.
Use a template when:
- your child gets frustrated easily
- you want usable labels
- you have mixed ages
- you’re short on time
Freestyle works when:
- it’s purely creative play
- they’re older and self-correcting
- the outcome doesn’t matter
Best middle ground
Draw the word. Tape it down. Bend over it.
Template guidelines
- letters 1 to 1.5 inches tall
- simple, single-line shapes
- avoid tight loops
- mark start point + direction
- optionally number bends
Tape the starting point with 1 to 2 inches of tape so it doesn’t move.
Proportion rule (this one matters)
- top (name/design) = 35 to 50% of total height
- stem = 50 to 65%
If the top is too big, the label won’t stand properly.
Indoor vs outdoor labels (these are not the same build)
Indoor labels can be lighter, decorative, and forgiving.
Outdoor labels need structure.
Stem length guidelines
- small indoor pots – 3 inches
- medium pots – 4 to 5 inches
- outdoor use – 5 to 7 inches total, with 2 to 3 inches buried
Height above soil
- seed trays – 2.5 to 4 inches
- pots – 4 to 7 inches
- garden beds – 6 to 10 inches
Structural fixes for outdoor use
- double stem (spaced 0.5 to 1 inch)
- wrapped join
- bottom loop anchor
- reinforced base bend
One small but critical habit
Make a pilot hole before inserting the label:
- depth = 50 to 75% of insertion depth
This prevents bending the label when pushing it into soil.
Safety (keep it simple and intentional)
You don’t need to overcomplicate this.
Core rules:
- pre-cut wire
- sit at a table
- keep scrap contained
- tuck every sharp end immediately
- keep lengths under 18 inches
- limit to 2 to 3 loose pieces per child
Workflow that works
Adult demonstrates → child bends → adult checks → child finishes
Quick safety check before finishing
- run a finger along the wire
- if it catches, fix it
- takes 10 to 20 seconds
Break timing
- younger kids – every 8 to 12 minutes
- older kids – every 15 to 20 minutes
Even 60 seconds helps reset focus.
Keeping kids engaged (this is about pacing, not entertainment)
The problem isn’t boredom – it’s stalled momentum.
Simple session structure
- 5 minutes → choose names/colours
- 10 minutes → first label
- 10 to 15 minutes → second label
- 5 minutes → display
Key rule
Keep idle time under 60 to 90 seconds.
After 2 minutes, attention drops fast.
What helps most
- short, recognizable words
- visible finished pieces
- clear stages (“now we do the stem”)
Small finishing ritual
Line up labels, take a photo, treat it like a mini display.
Keep it short: 2 to 5 minutes
One underrated trick
Let kids move before starting.
Even 10 to 15 minutes of movement makes a huge difference in focus.
Kit vs DIY (this is about friction, not just cost)
Minimum wire needed:
- 30 to 50 inches per child
- enough for 2 labels + 1 practice
Kits are better when:
- you want zero setup
- you don’t have tools
- you want convenience
DIY is better when:
- you want better wire
- you’ll repeat the activity
- you want control over quality
Setup benchmark
- total setup + cleanup should be under 10 minutes
- over 15 to 20 minutes, it won’t get repeated
What success actually looks like (this is the part people forget)
Not perfect. Not neat. Not Instagram-ready.
Just:
- 1 finished label per child
- 20 to 40 minutes engaged time
- no sharp edges
- willingness to do it again
Final polish (keep it light)
Spend 30 to 90 seconds per label:
- flatten twists
- straighten stem
- tighten one or two loops
That’s it.
Final thought
You’re not aiming for perfect labels.
You’re aiming for that moment where a child holds something slightly uneven and says, “I made this.”
And it actually works.